Do you actually need to seal the tailgate gap?
If the bed is going to be your storage, yes. Once a camper is mounted, the space underneath stops being a truck bed and becomes a gear locker, and the tailgate is the largest opening into it. Dust off a forest road and spray off wet pavement both come straight through that seam.
What surprised me is how much is still open after you fit the part most people buy. I’ll show that below with photos, because it’s the thing I’d have wanted to see before ordering.
This is one of a few jobs worth doing before the camper goes on. I sealed the bed rails in the same stretch, and that one is a now-or-never job since the rails disappear under the camper.
What do you actually need to buy?
Two pieces, both made by Extruded Solutions and bought manufacturer-direct rather than through a marketplace:
- ESI ROK Block 4.25" gap cover, which bridges the long seam between bed floor and tailgate. Product page.
- ESI Ultimate Tailgate Seal with Taper Seal, 6-foot, which seals the two sidewalls. There’s a Tacoma-specific listing too.
Check fitment before ordering. Mine is the 2016 to 2023 Tacoma, a different part from the 2024-plus truck and from the wider XL. ROK Block publishes a per-model fitment page with exact part numbers.
Buy one taper kit, not two, and ideally buy the combo. One kit covers both sidewalls, upper and lower pieces per side. I ordered two assuming it was one per side and now have a complete spare on a shelf. Worse, I bought the pieces separately when ESI sells the gap cover and the 6-foot sidewall seal as one bundle. That bundle is the purchase I’d make again.
Before you start: the parking trap
This one has nothing to do with skill and everything to do with planning.
The lower seal needs roughly 24 hours to cure with the tailgate left open. Not closed. Open. Mine ended up sitting open for two days.
Not pictured: my Tacoma in tight street parking with the tailgate hanging open for two days. Sorry, neighbors. Sort this out before you peel a single backing strip: have somewhere safe to park it, don’t schedule errands, and consider flagging the open tailgate so nobody walks into it in the dark.
Do the sidewalls first and the cure lands at the end of the job, where it belongs. That is the practical reason behind ESI’s install order, and it took me until afterwards to see it. Fitting the side seals means opening and closing the tailgate over and over, which is exactly what you cannot do while a bottom seal is curing. Sides first, gap cover second, then park it open and walk away. I went the other way round and turned the cure into a gate in the middle of the job instead of the end of it.
Installing the ROK Block
I’m describing these in the order I did them, which is backwards from ESI’s. If you’re following along, do the sidewall seals first and come back to this section second. Why, and what it actually cost me.
The install itself is straightforward. Adhesive-backed extrusion, no drilling, more patience than technique. The ROK Block took me about an hour and a half, and the two sidewalls about an hour, working deliberately and not rushing. Call it half a day with the cure sitting in the middle of it.
Tools are almost nothing: a rag, isopropyl, and something to cut with. I used kitchen utility scissors and they went through the extrusion cleanly, so don’t overthink it. The kit includes an adhesion-promoter pen, and on the bed’s textured surface it’s worth using.
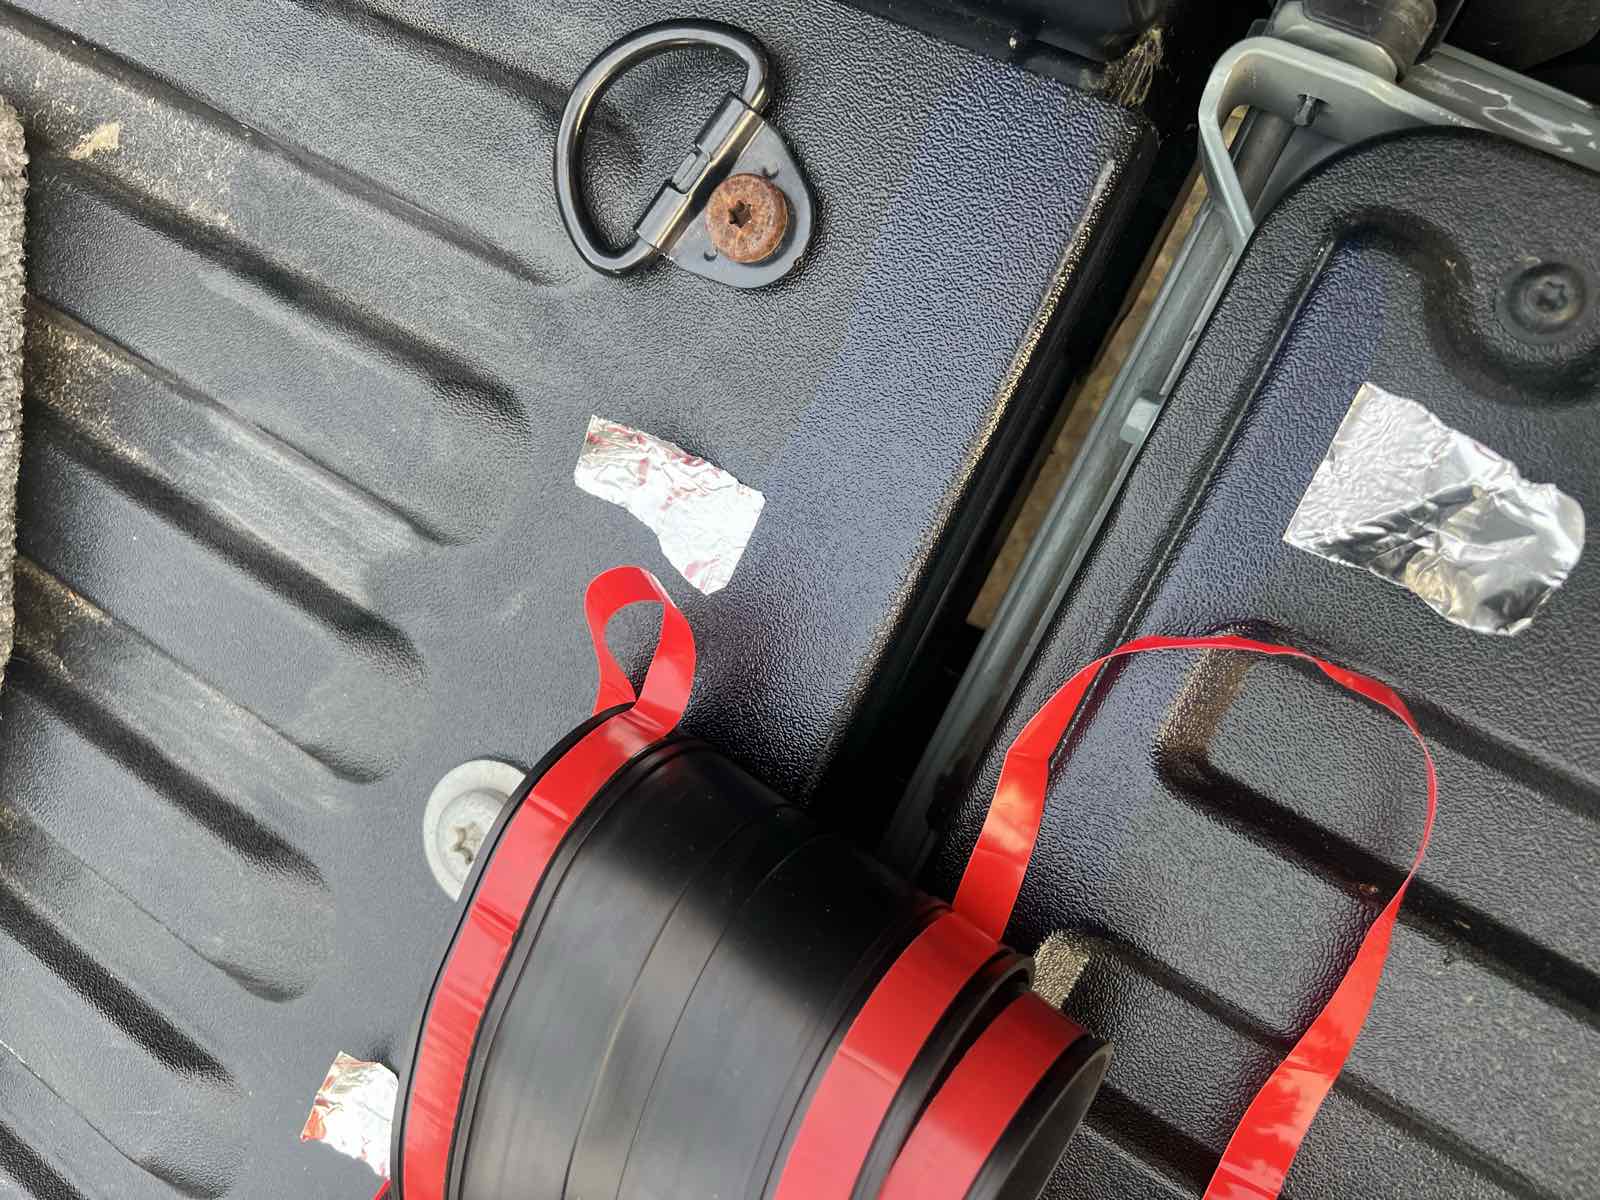
The trick I’d pass on: mask the ends of the promoter line with small squares of aluminum tape. The promoter goes on wet and it’s easy to run past where the seal will actually sit, leaving residue outside the footprint. A couple of tape squares give you a clean stop line.
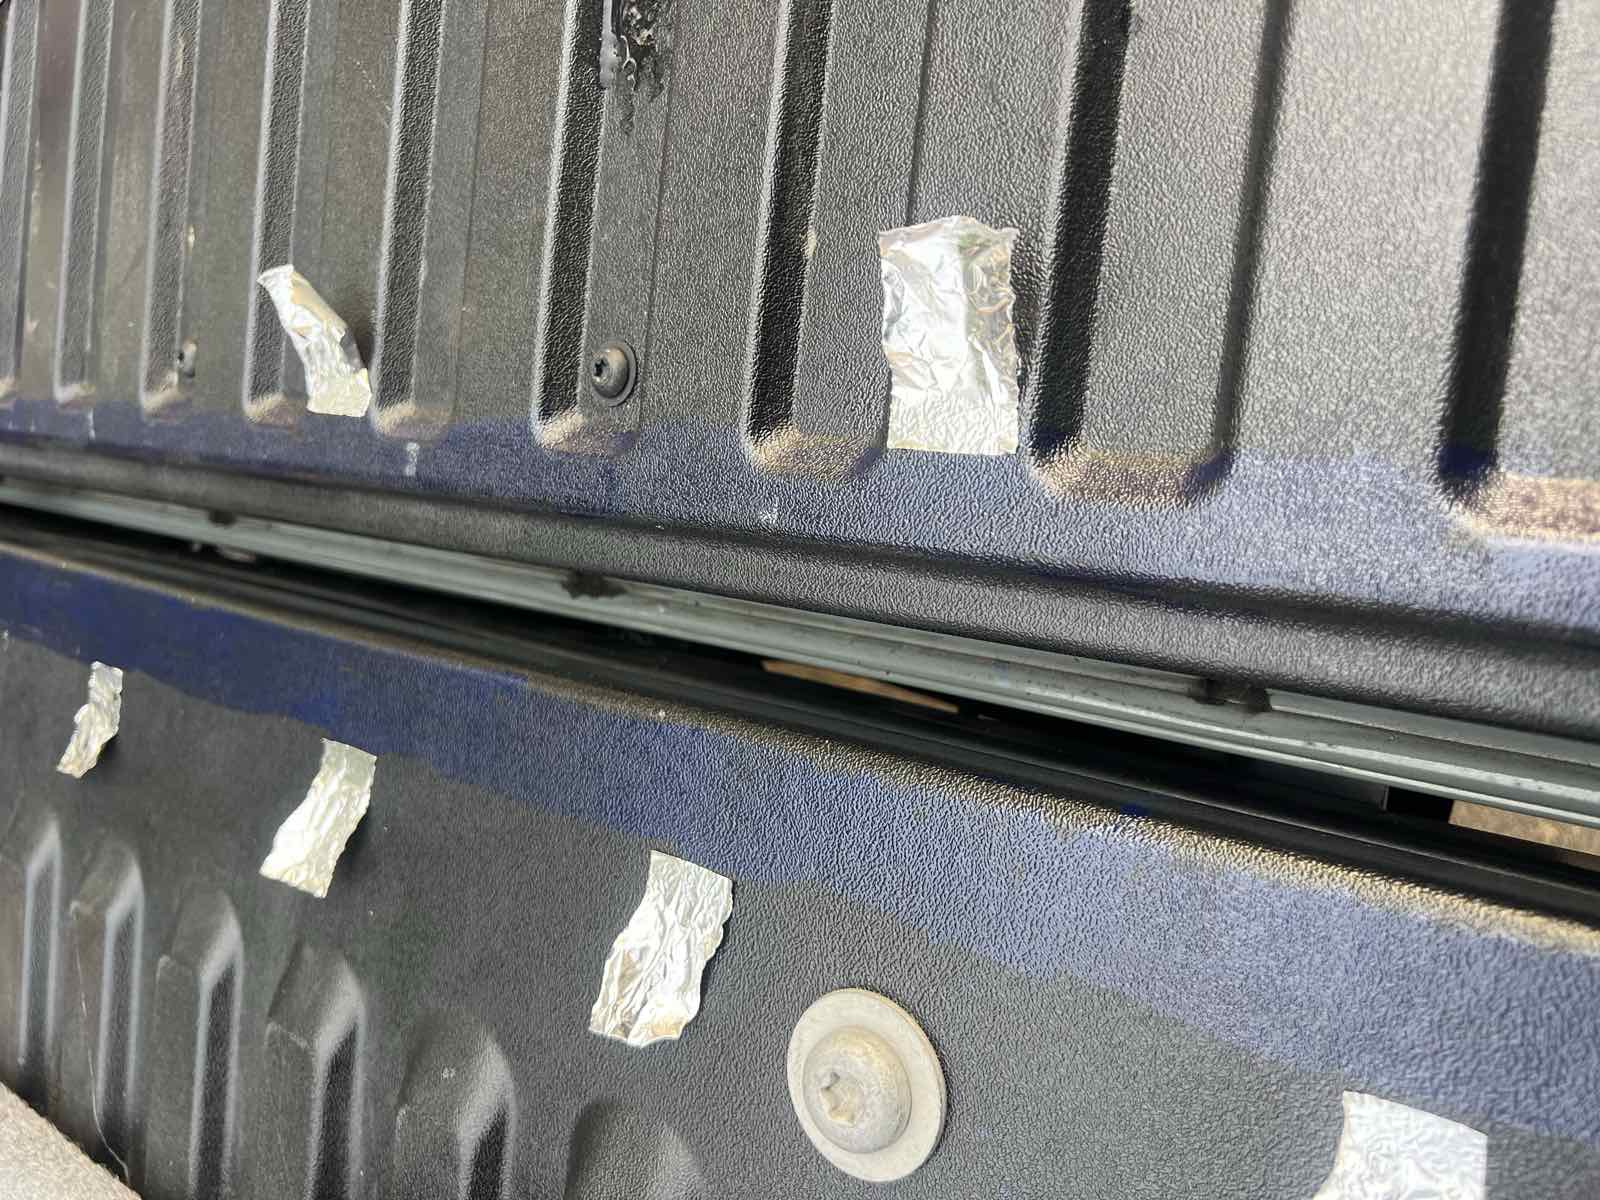
Then clean with isopropyl and let it flash off. Same discipline as any adhesive job: clean and oil-free, or it fails quietly months later. Watch the temperature too, since the adhesive wants roughly 50 to 104°F. I installed in Denver at around 90°F, near the top of that band, which gave a fast and aggressive grab.
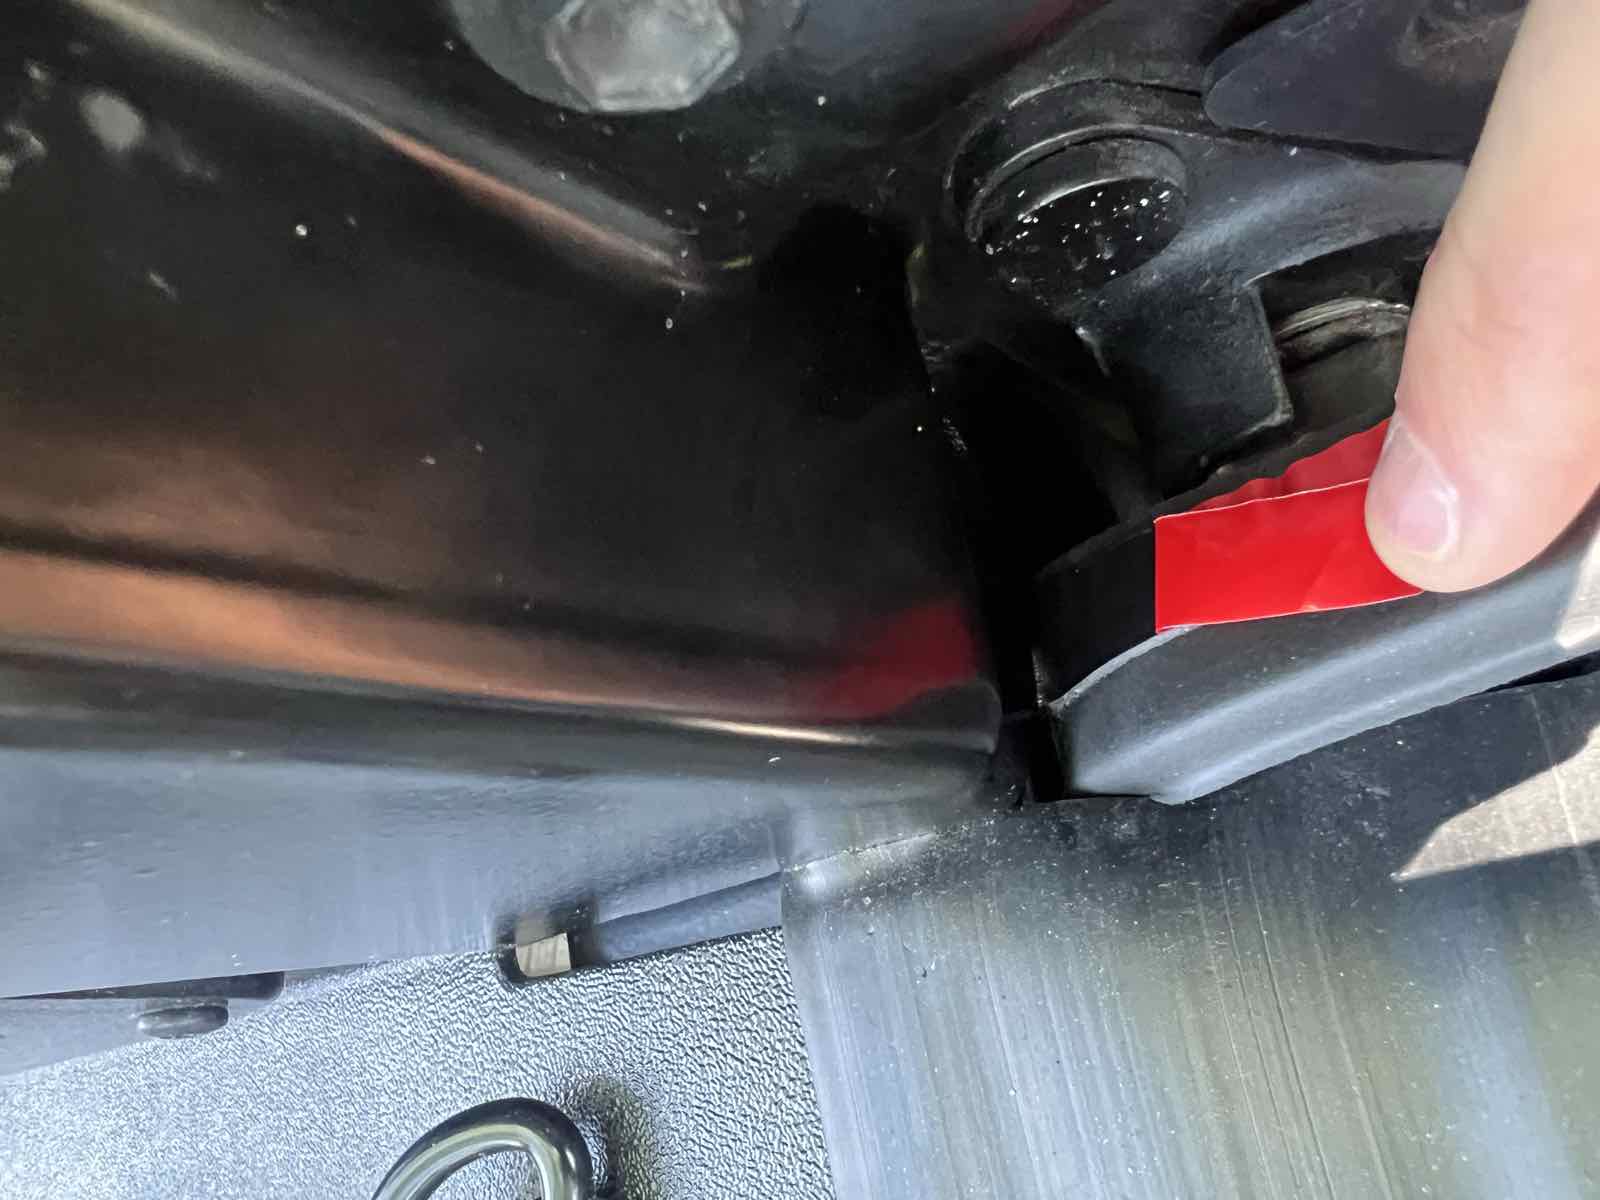
I worked left to right, and the thing that made it manageable was peeling the red backing about eight inches at a time rather than stripping the whole length. You get to press each section down deliberately instead of fighting a six-foot strip of exposed adhesive.
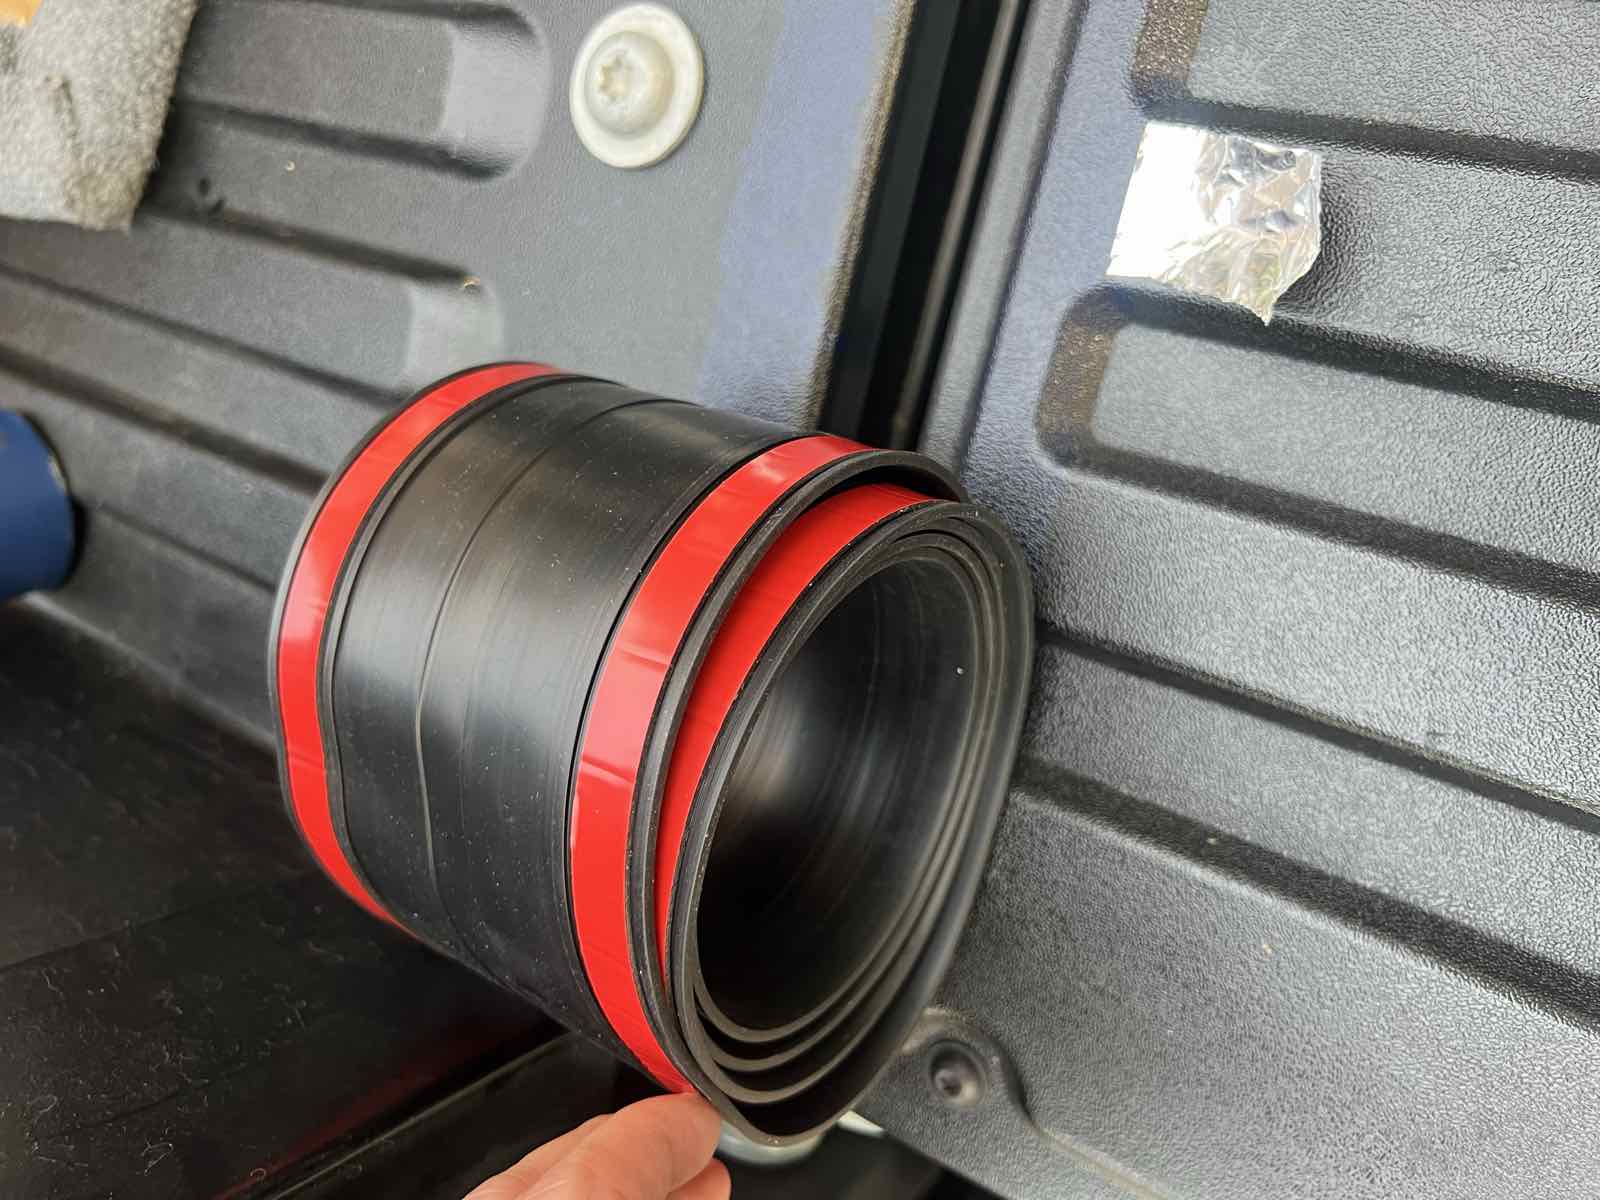
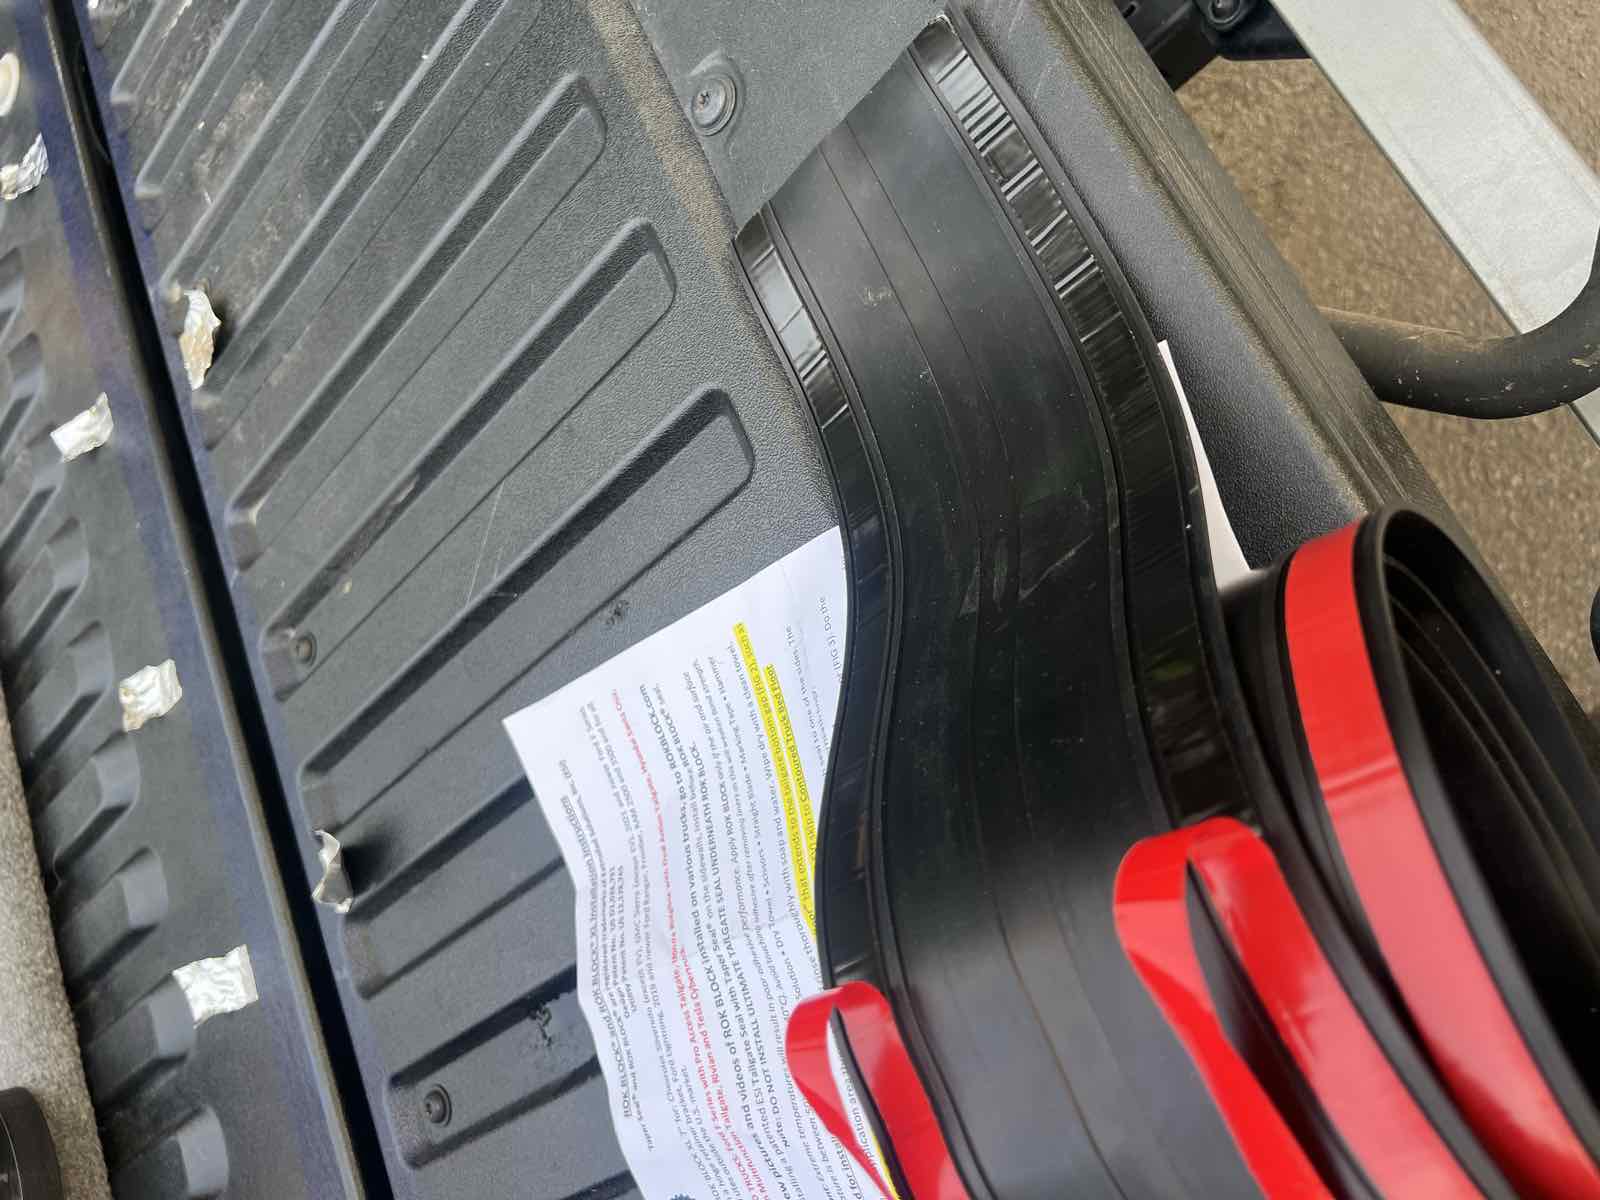
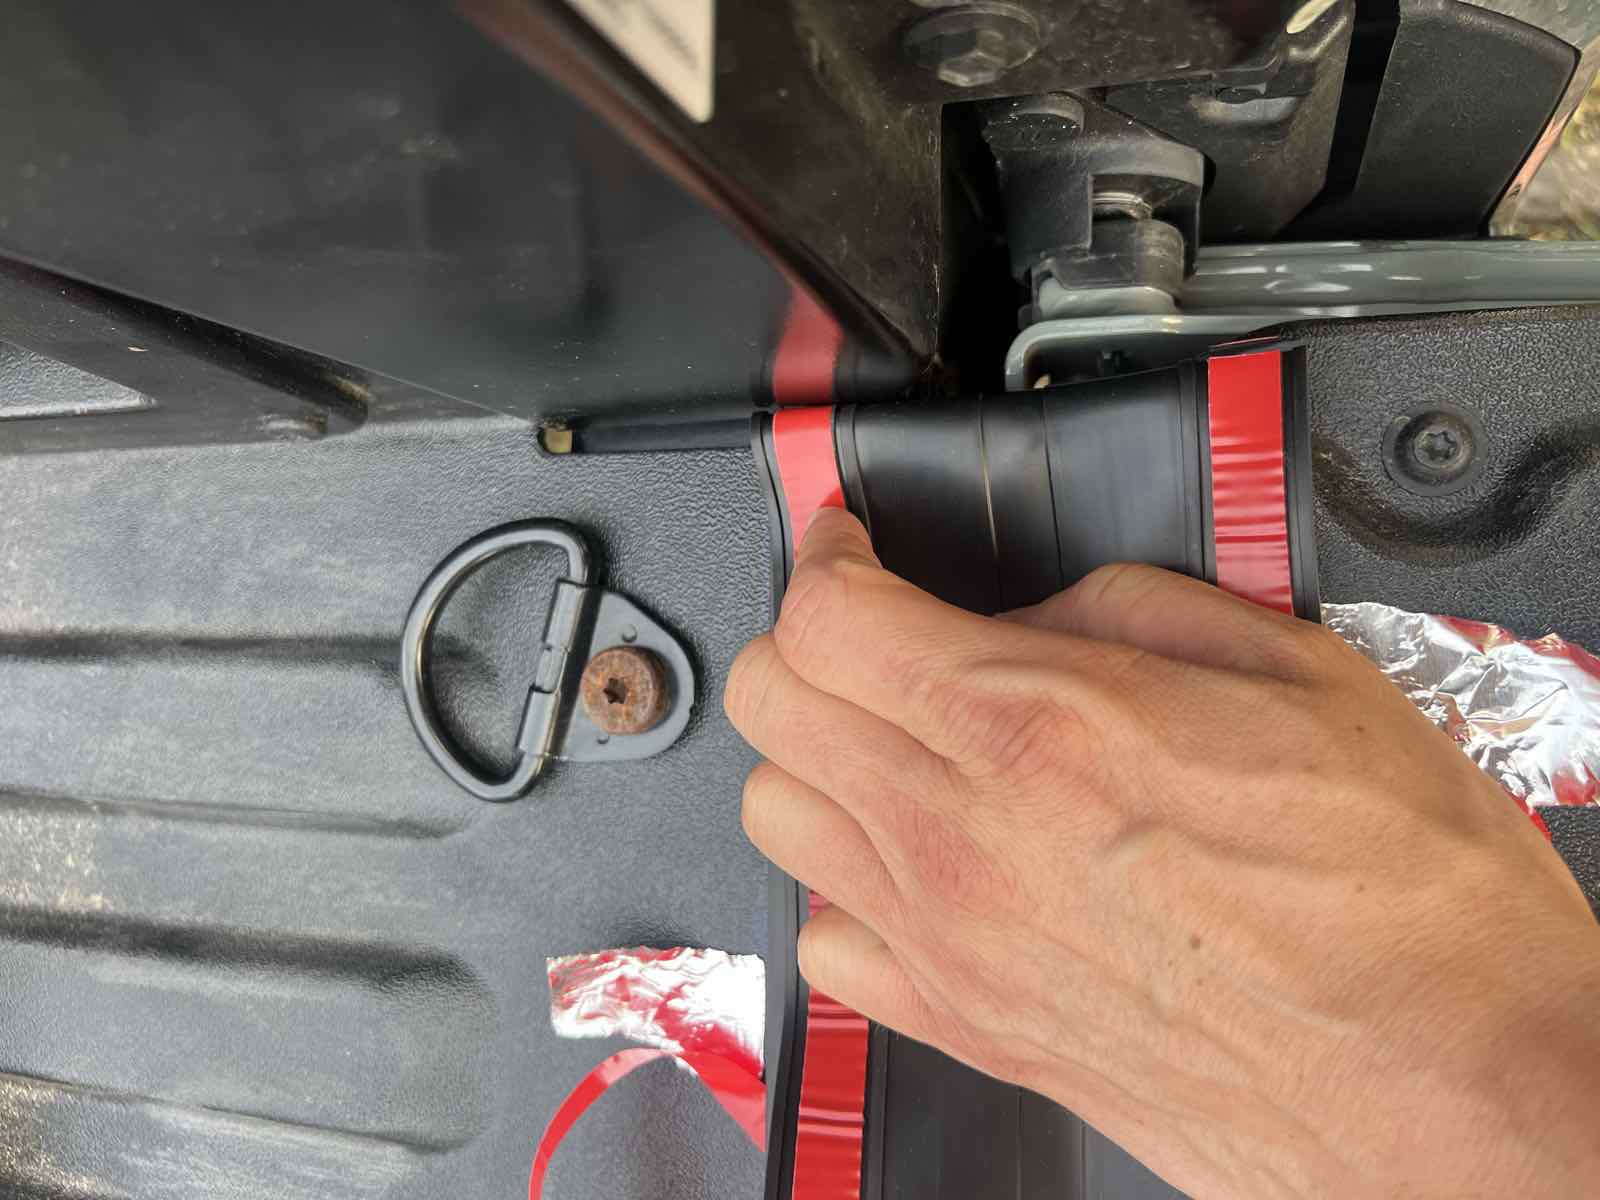
At the far end the extrusion runs long and needs trimming. Don’t pre-cut this one. Lay the whole length down first, then fold the tail against the bedside to mark your line and cut there. You could measure and cut first, but the piece must not slide while you’re working it, and having one end already stuck is what stops that. Trim last, then press the end home.
Why the gap cover on its own isn’t enough
Here’s the part I wanted to see before I ordered, and couldn’t find anywhere.
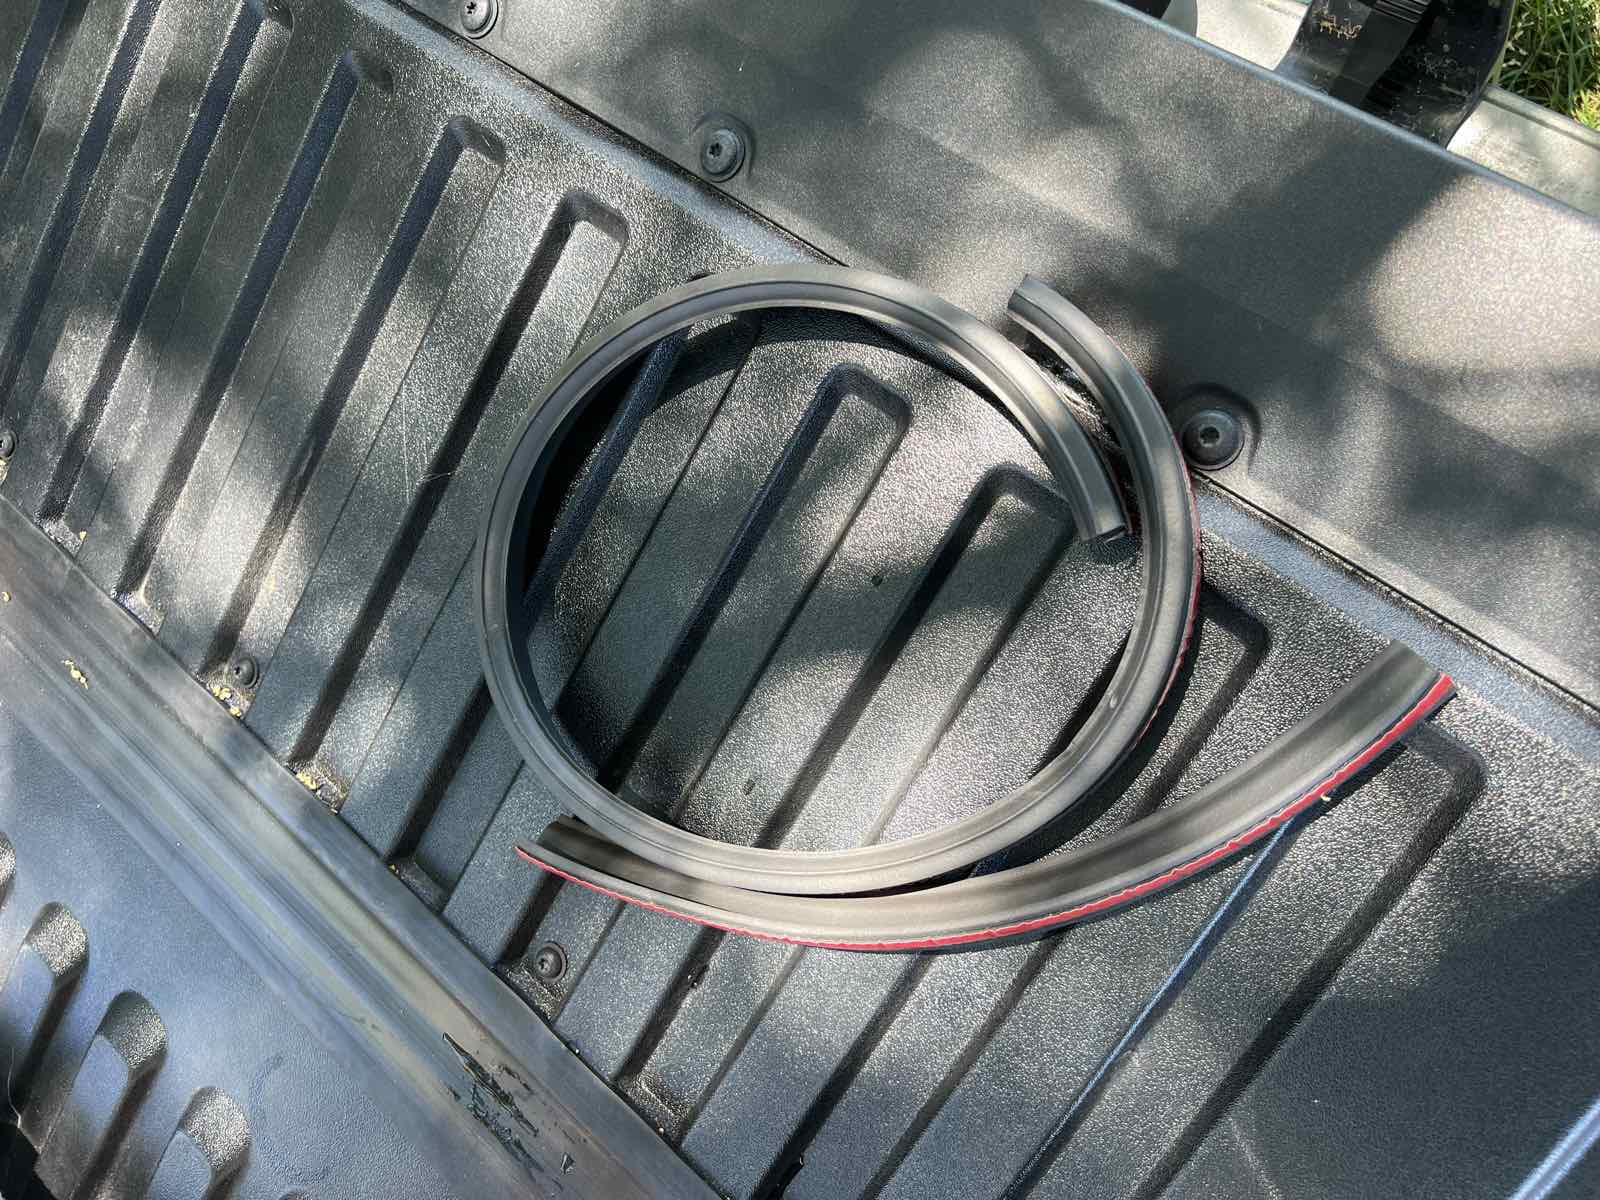
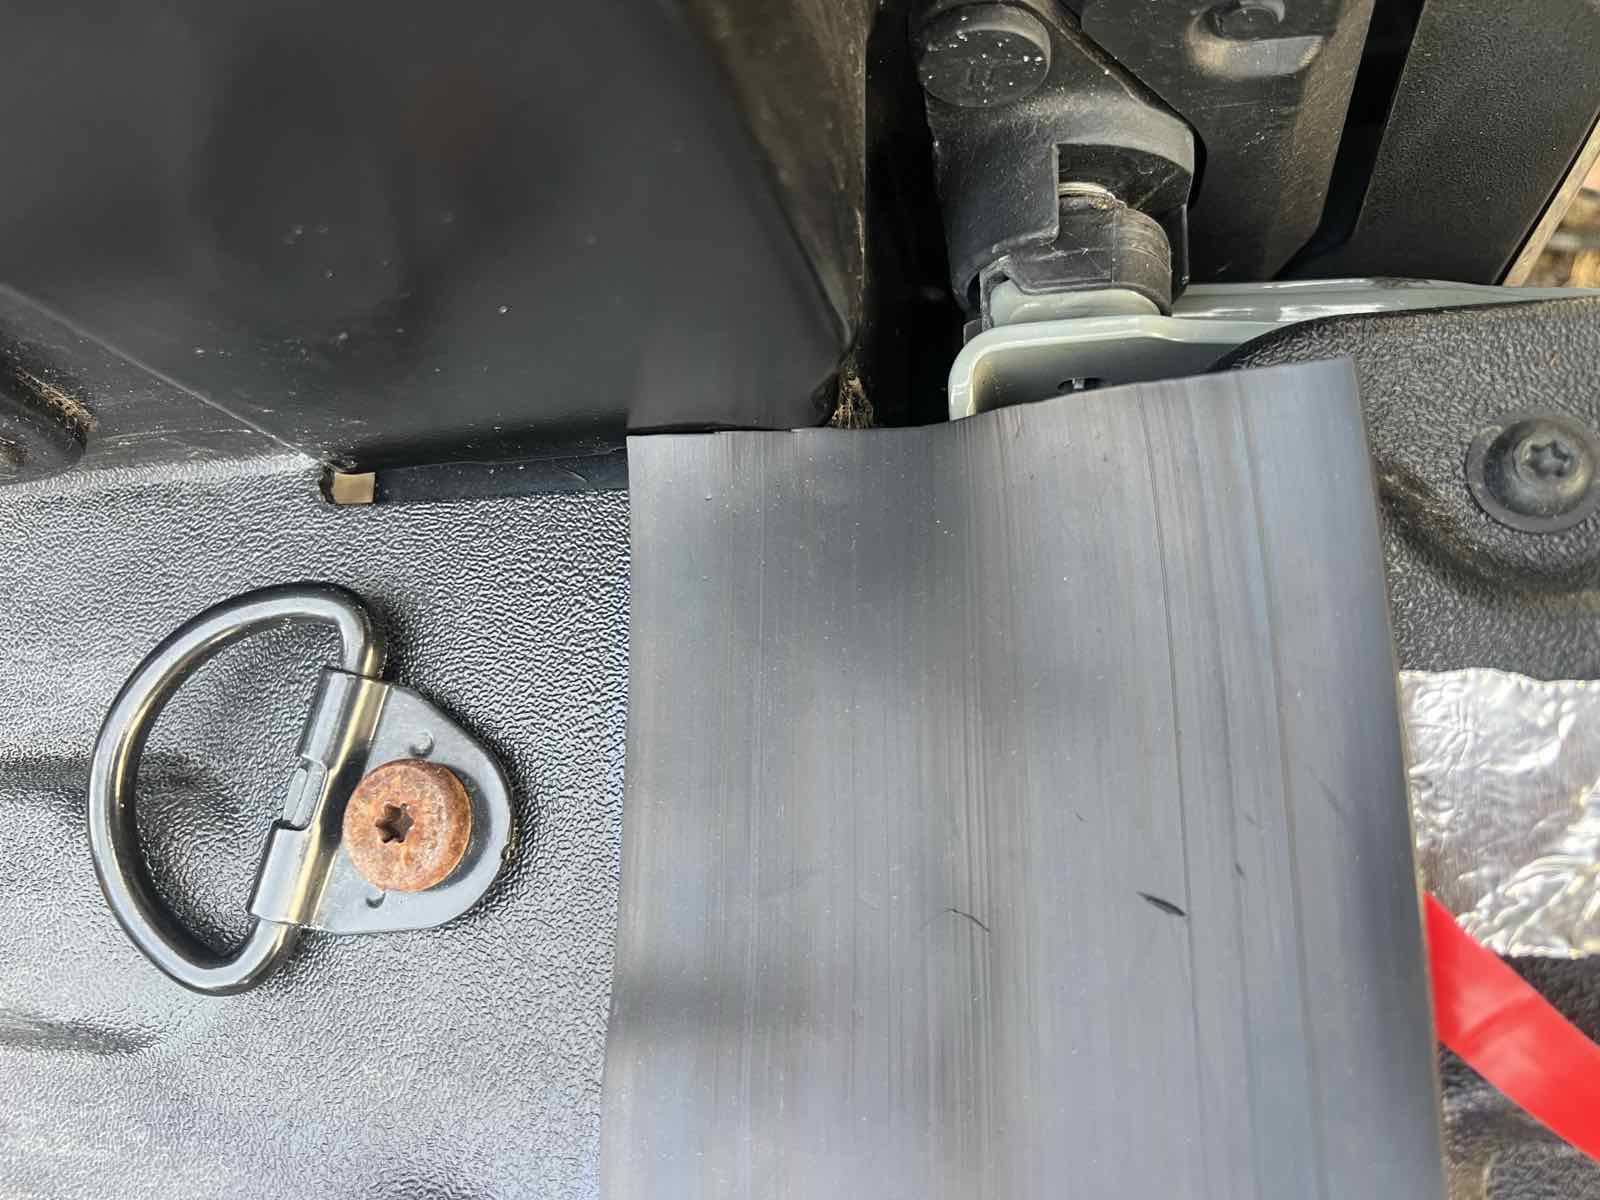
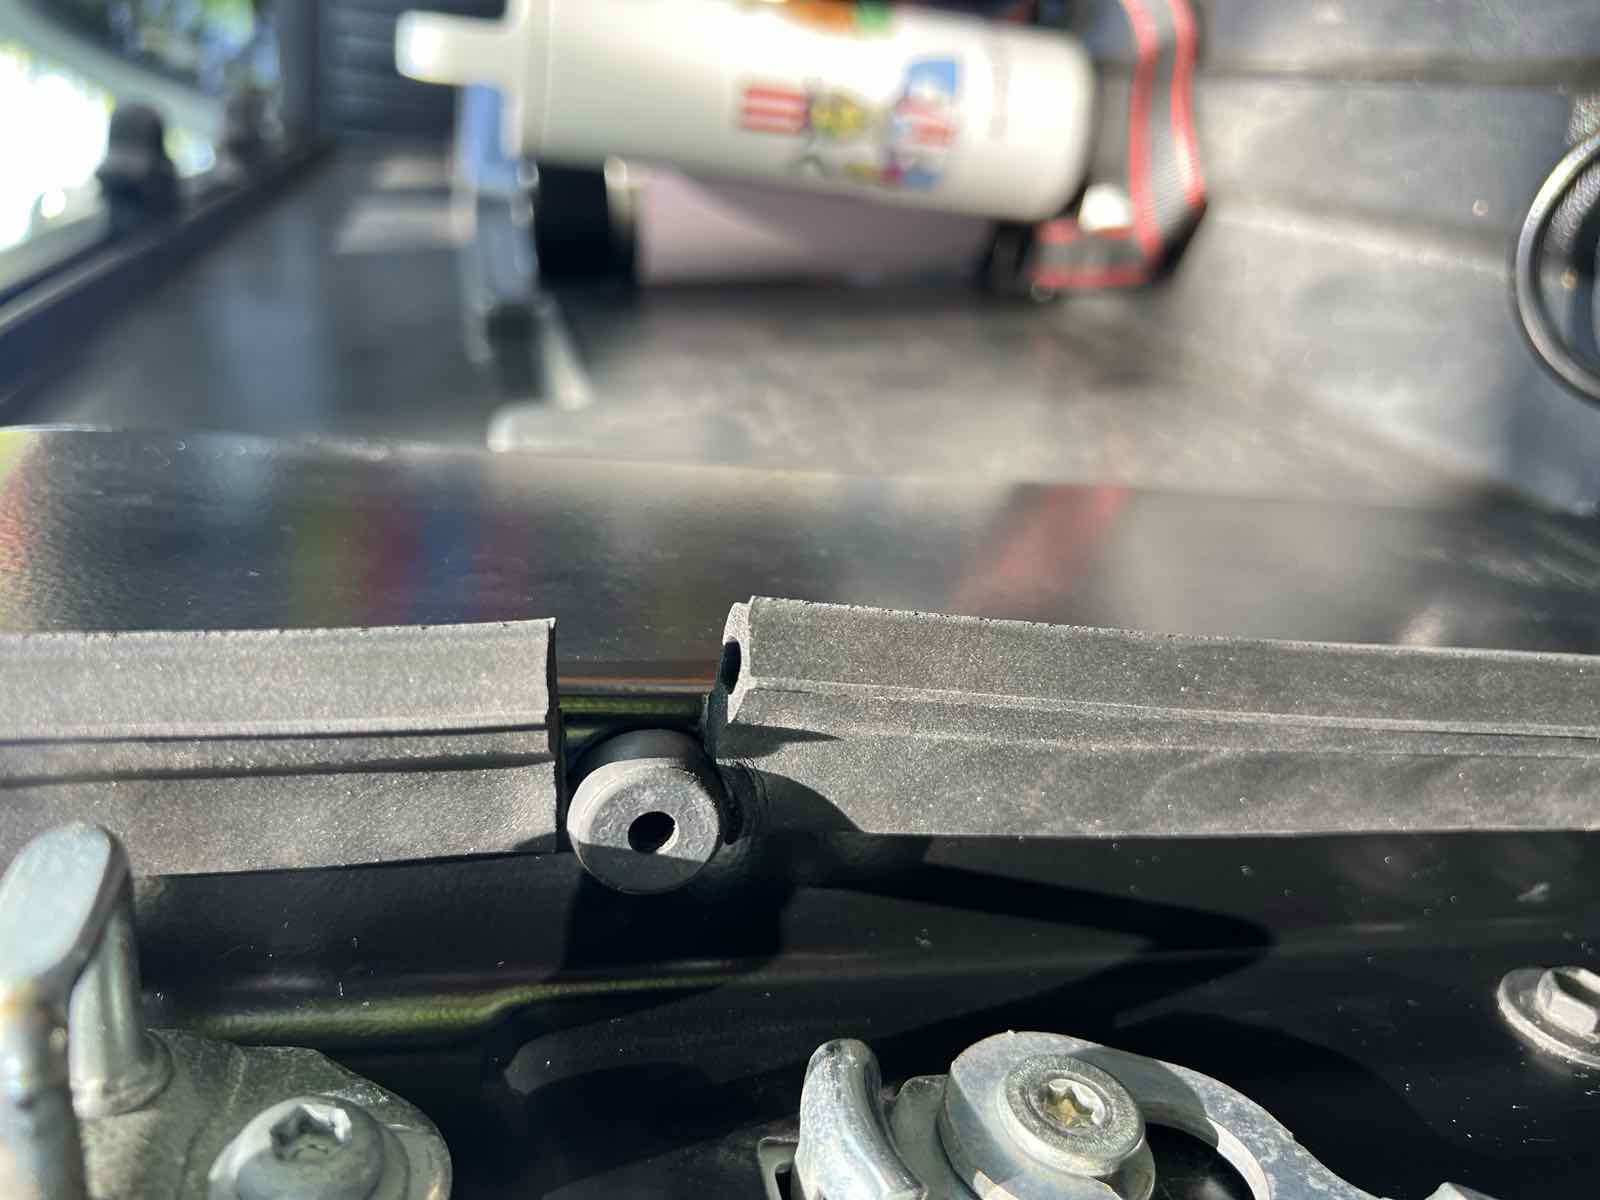
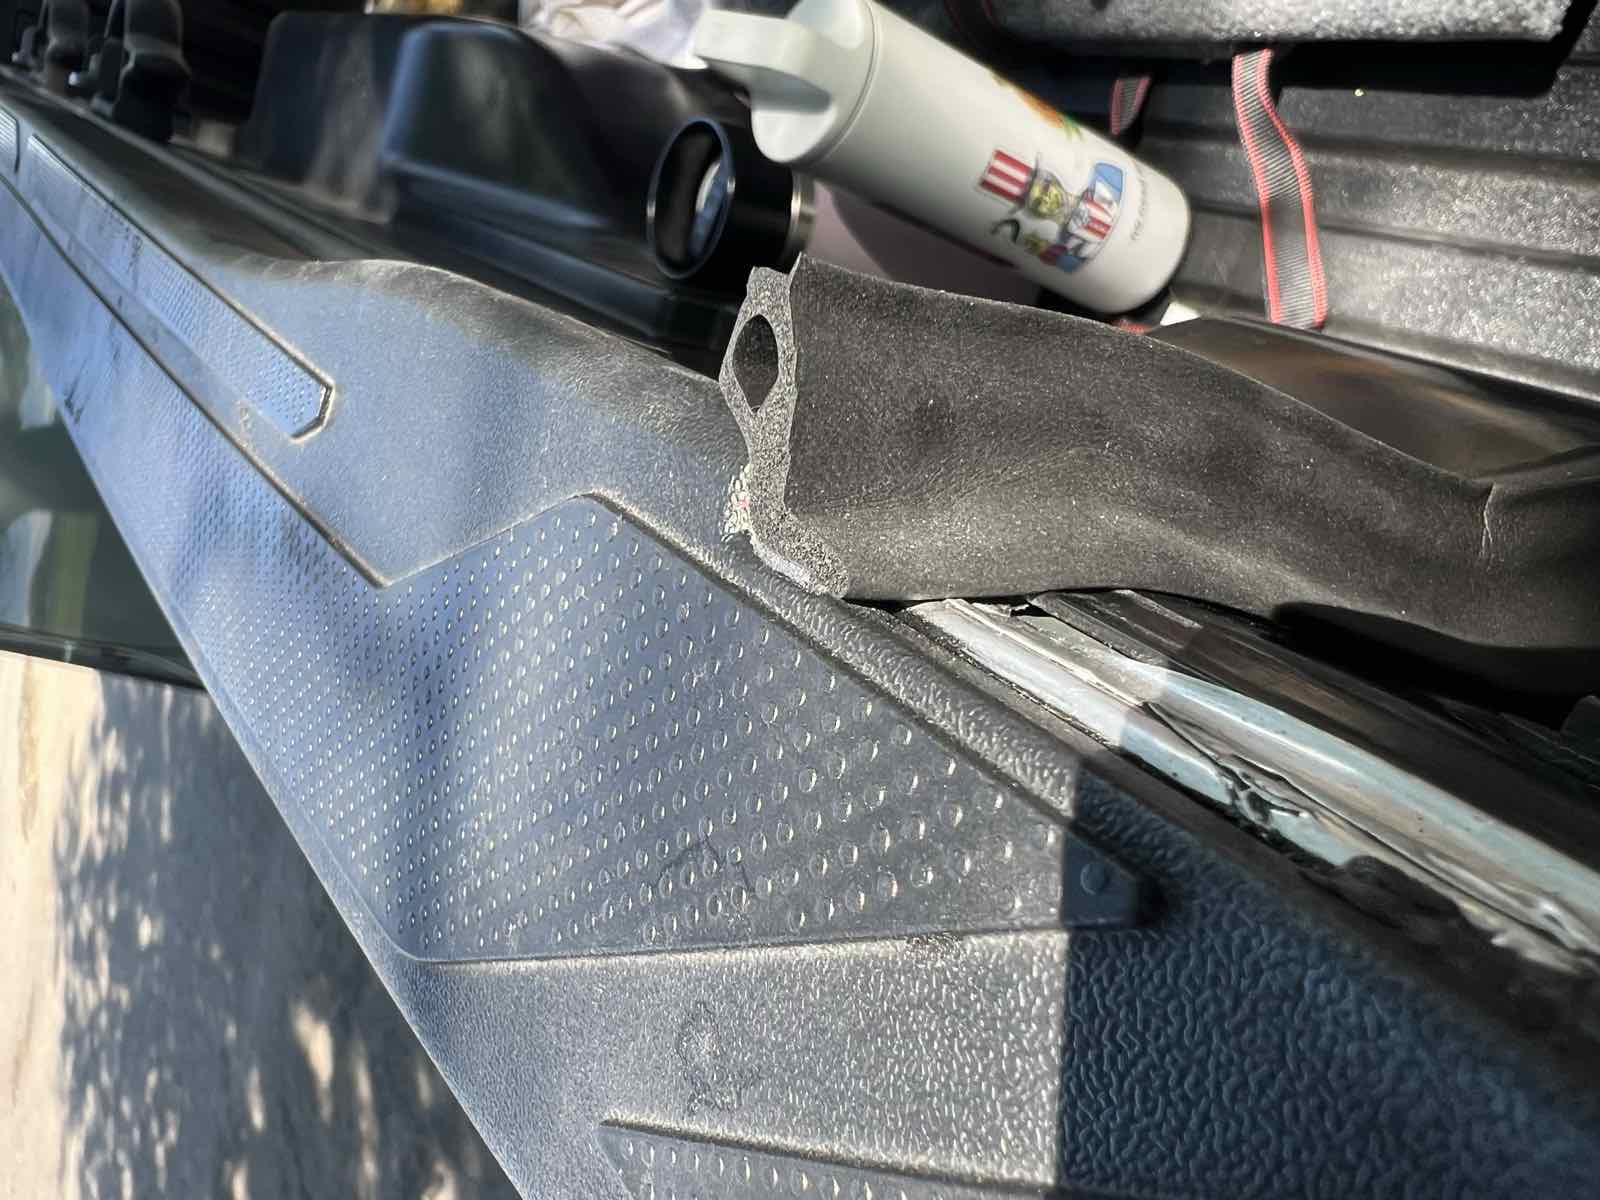
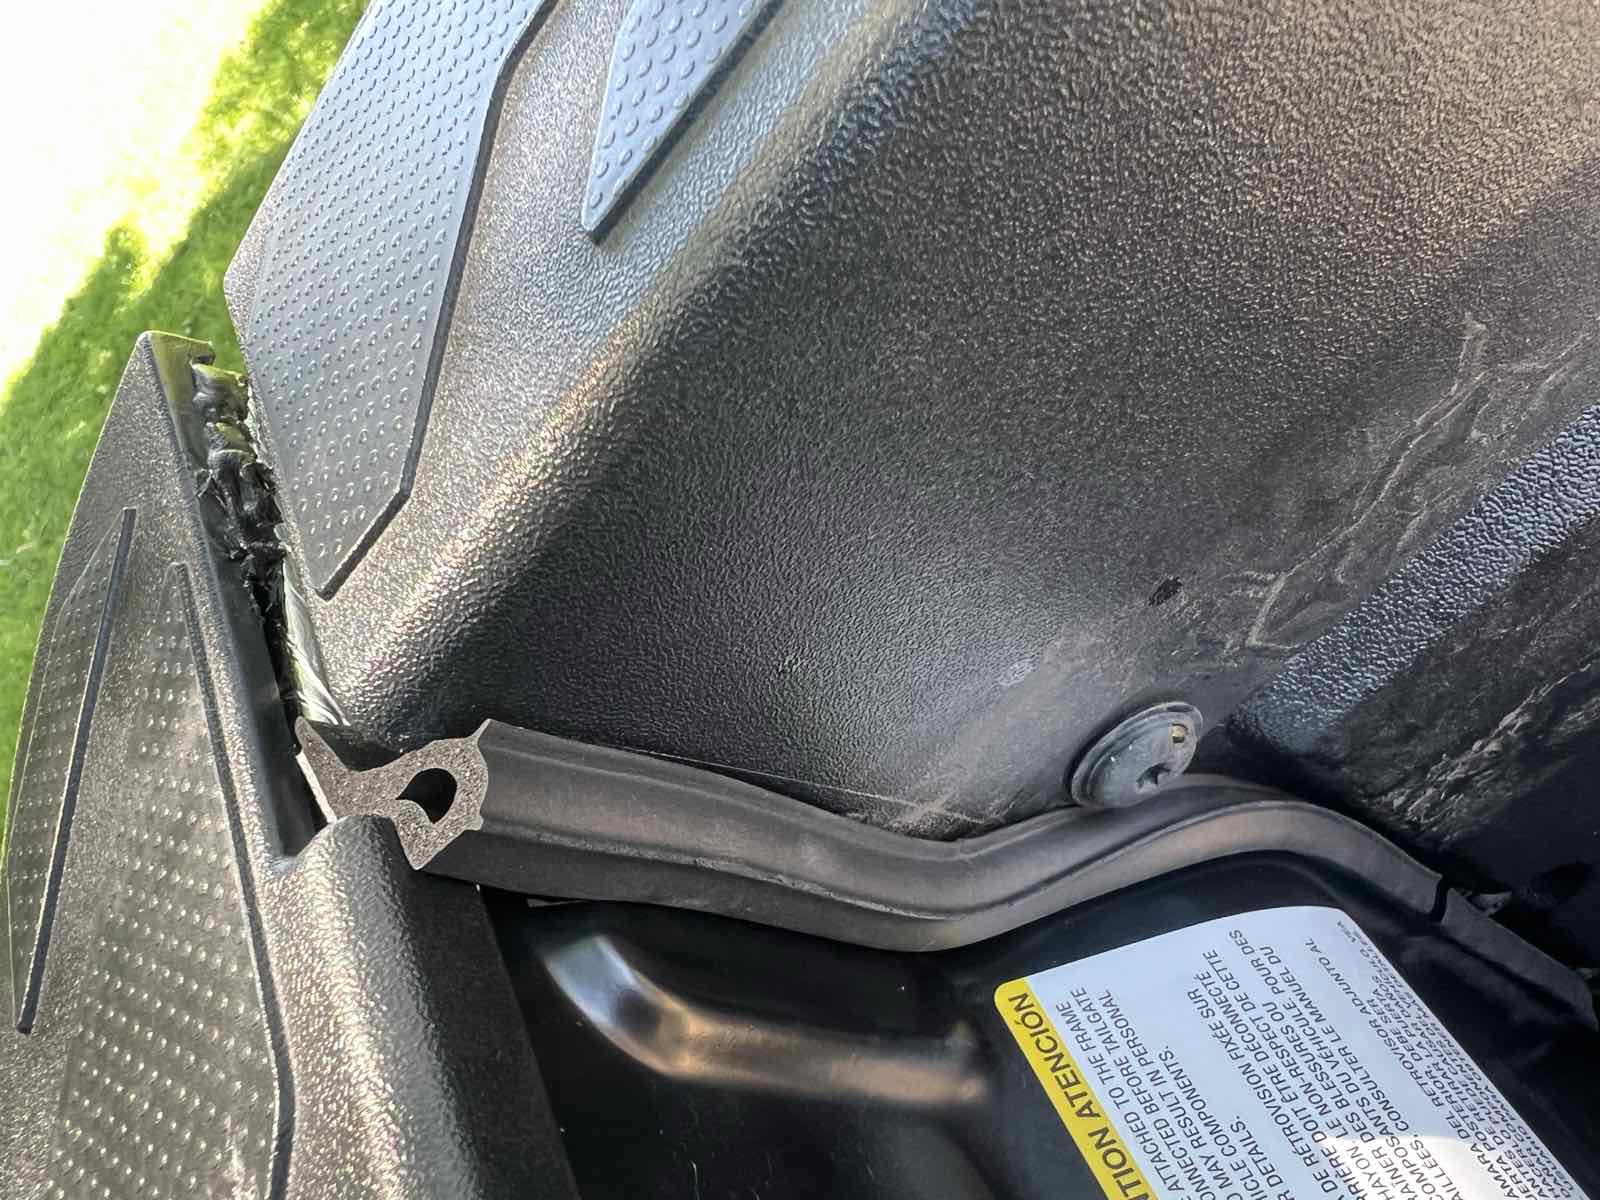
With the ROK Block installed and the tailgate shut, I could still see daylight through the corners. The gap cover does its job on the long bottom seam, but the corners where the tailgate meets the bed sidewalls stay open, and so do the sidewalls themselves. These photos are that exact state: gap cover on, taper seals not yet fitted.
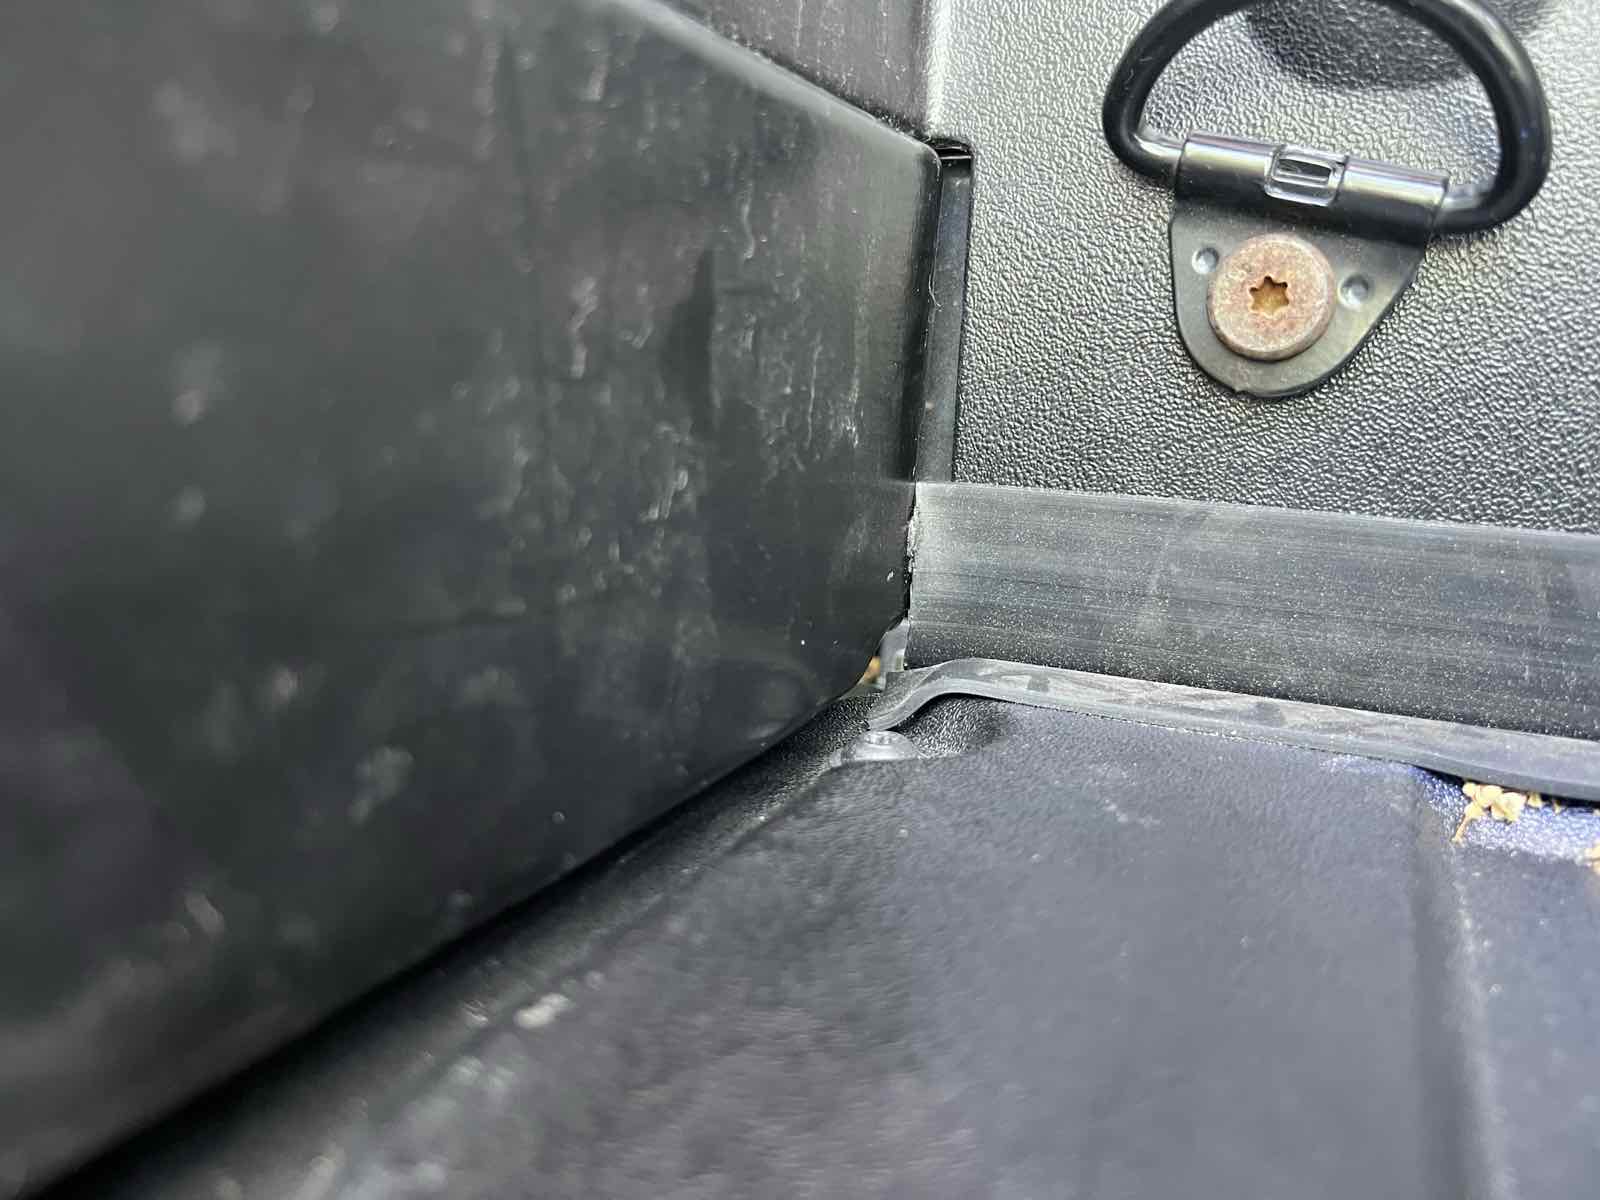
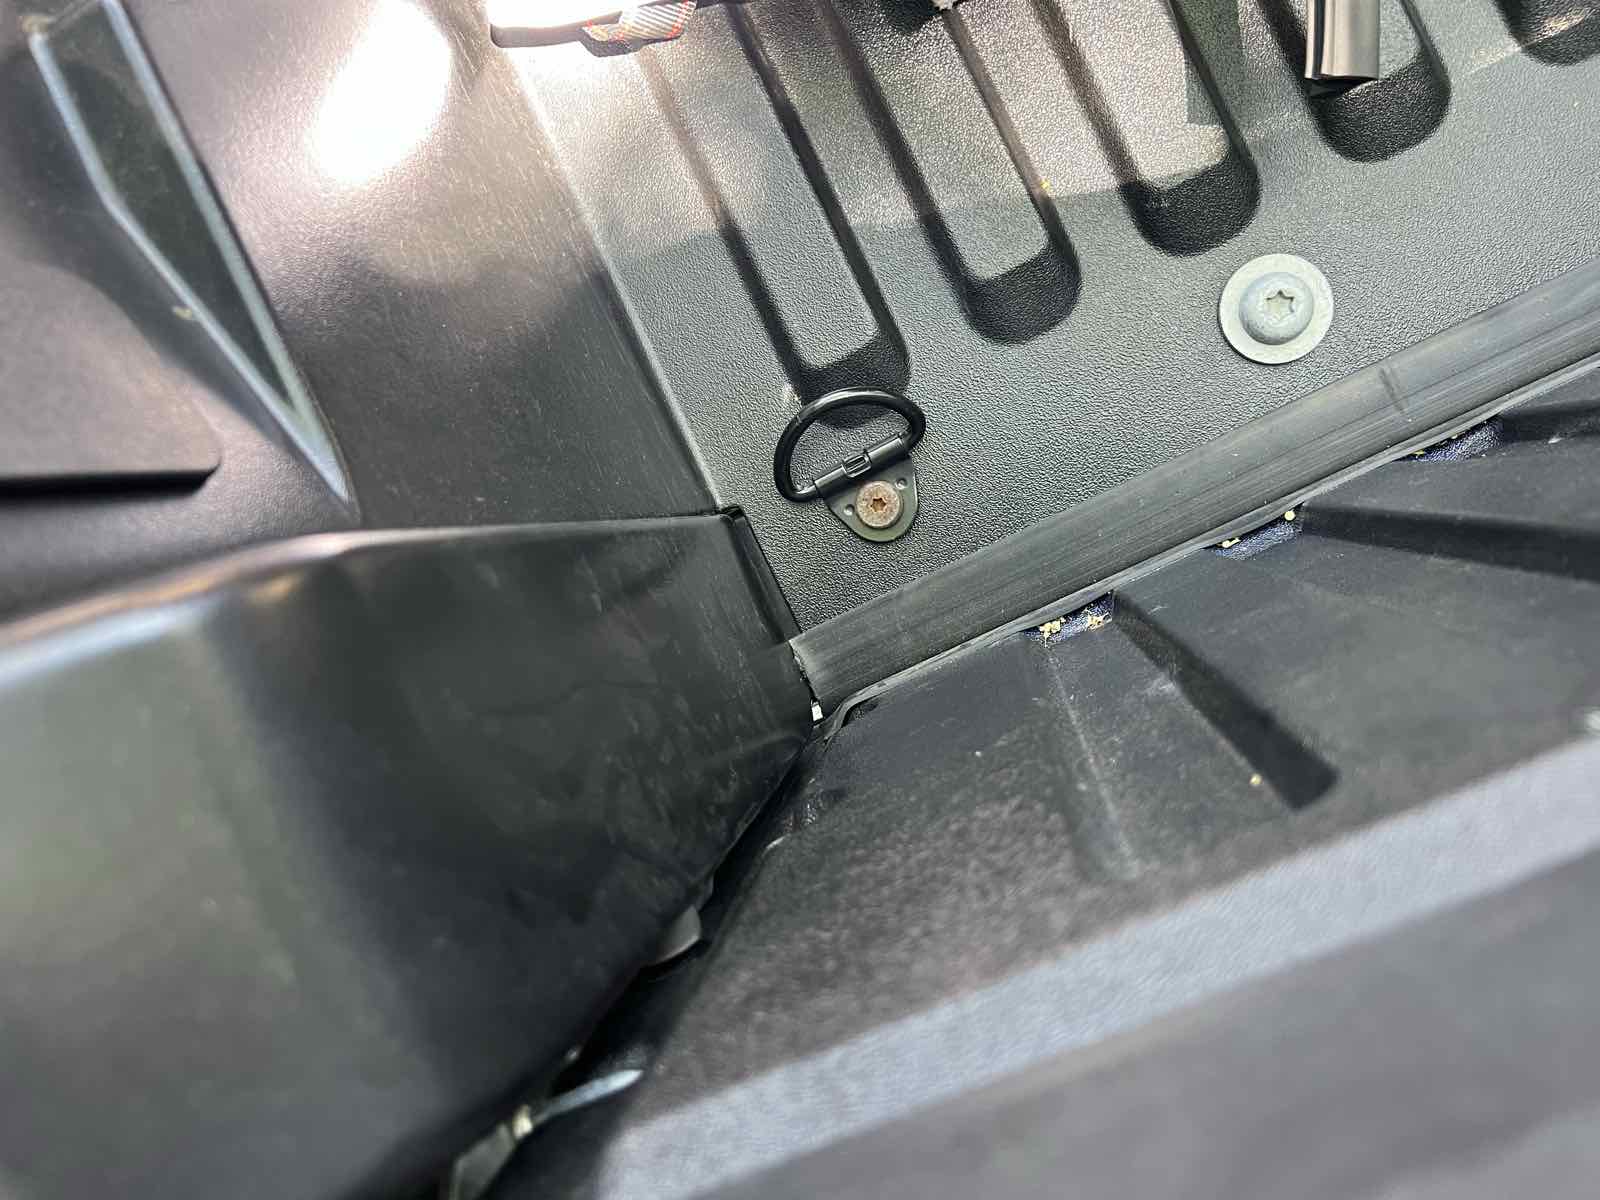
This matches what other owners run into. A 2023 Tacoma owner running the same camper reported still getting moisture “around the tailgate, the upper areas and on the sides” with a tailgate seal already fitted. That’s the documented failure mode, and now I know exactly what it looks like.
Installing the sidewall taper seals is what closed it. If you only budget for the gap cover, budget again.
The sidewall taper seals
Same discipline, one extra step: there’s a factory sticker on the bedside that needs to come off first, and the surface wants the same isopropyl scrub. Worth photographing your own before-and-after, because it’s obvious in hindsight and easy to skip in the moment.
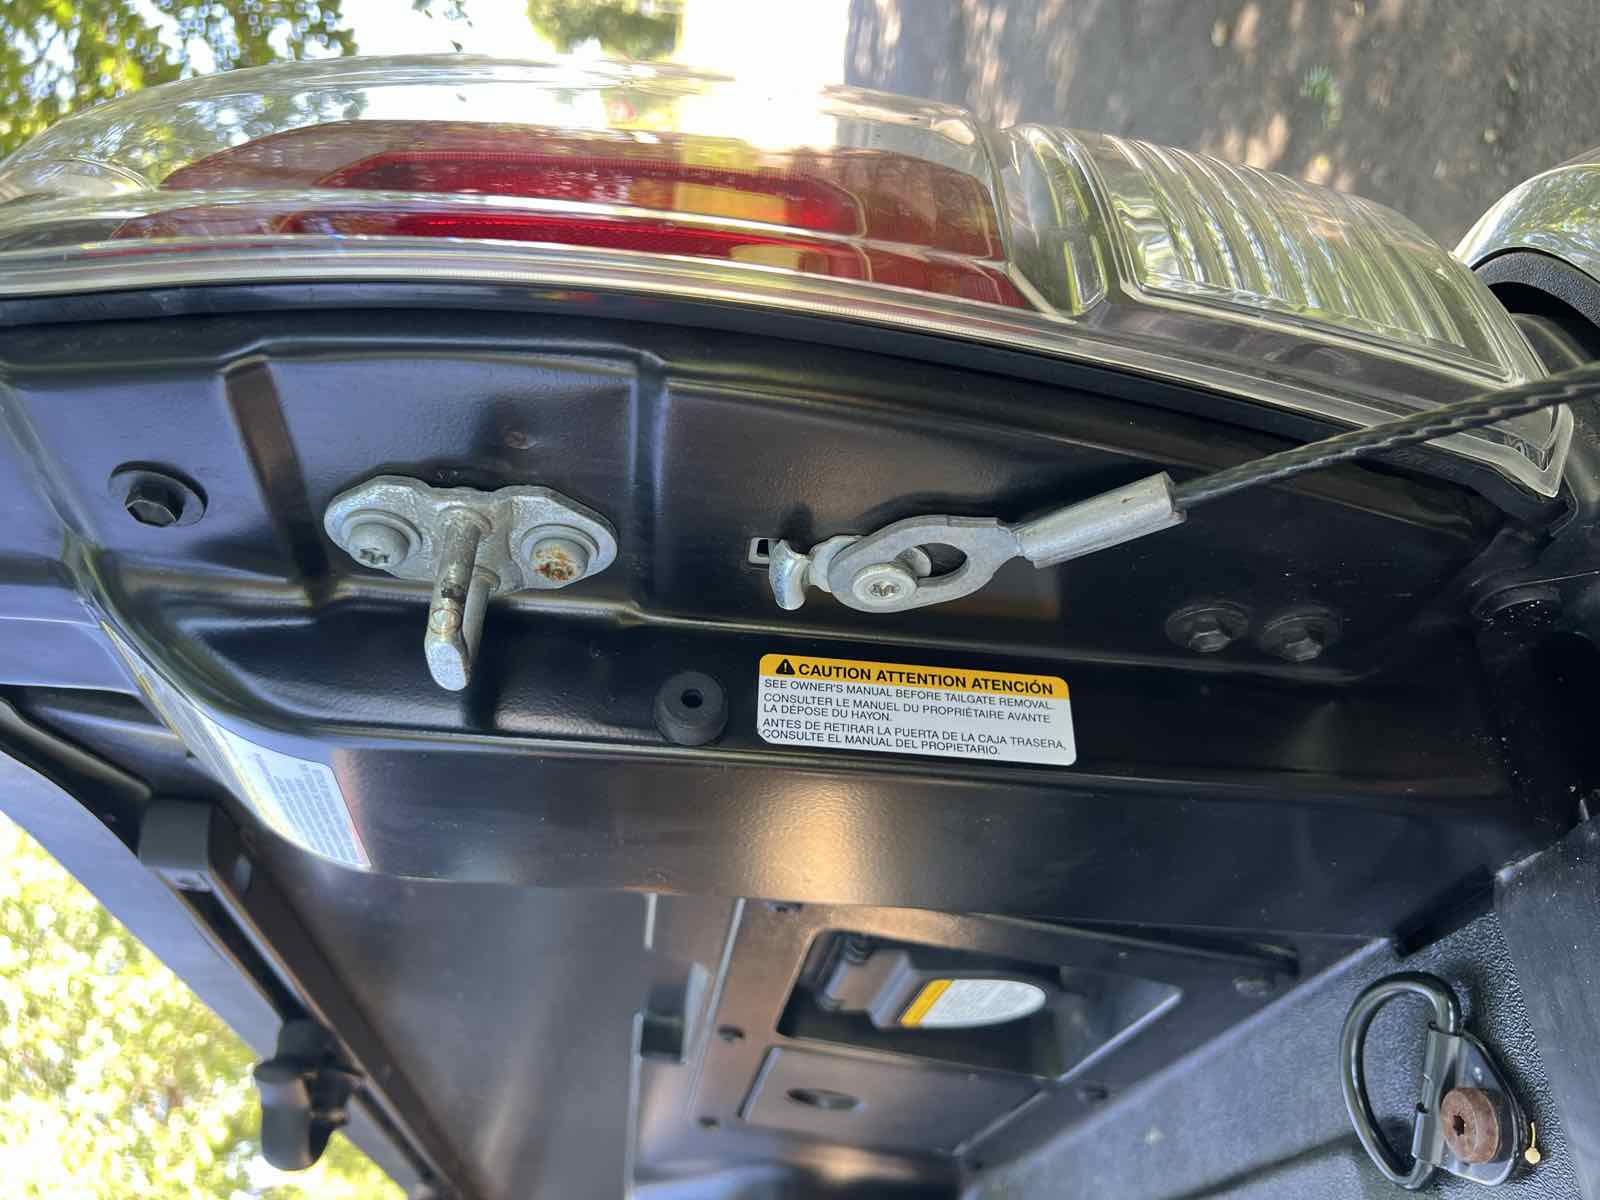
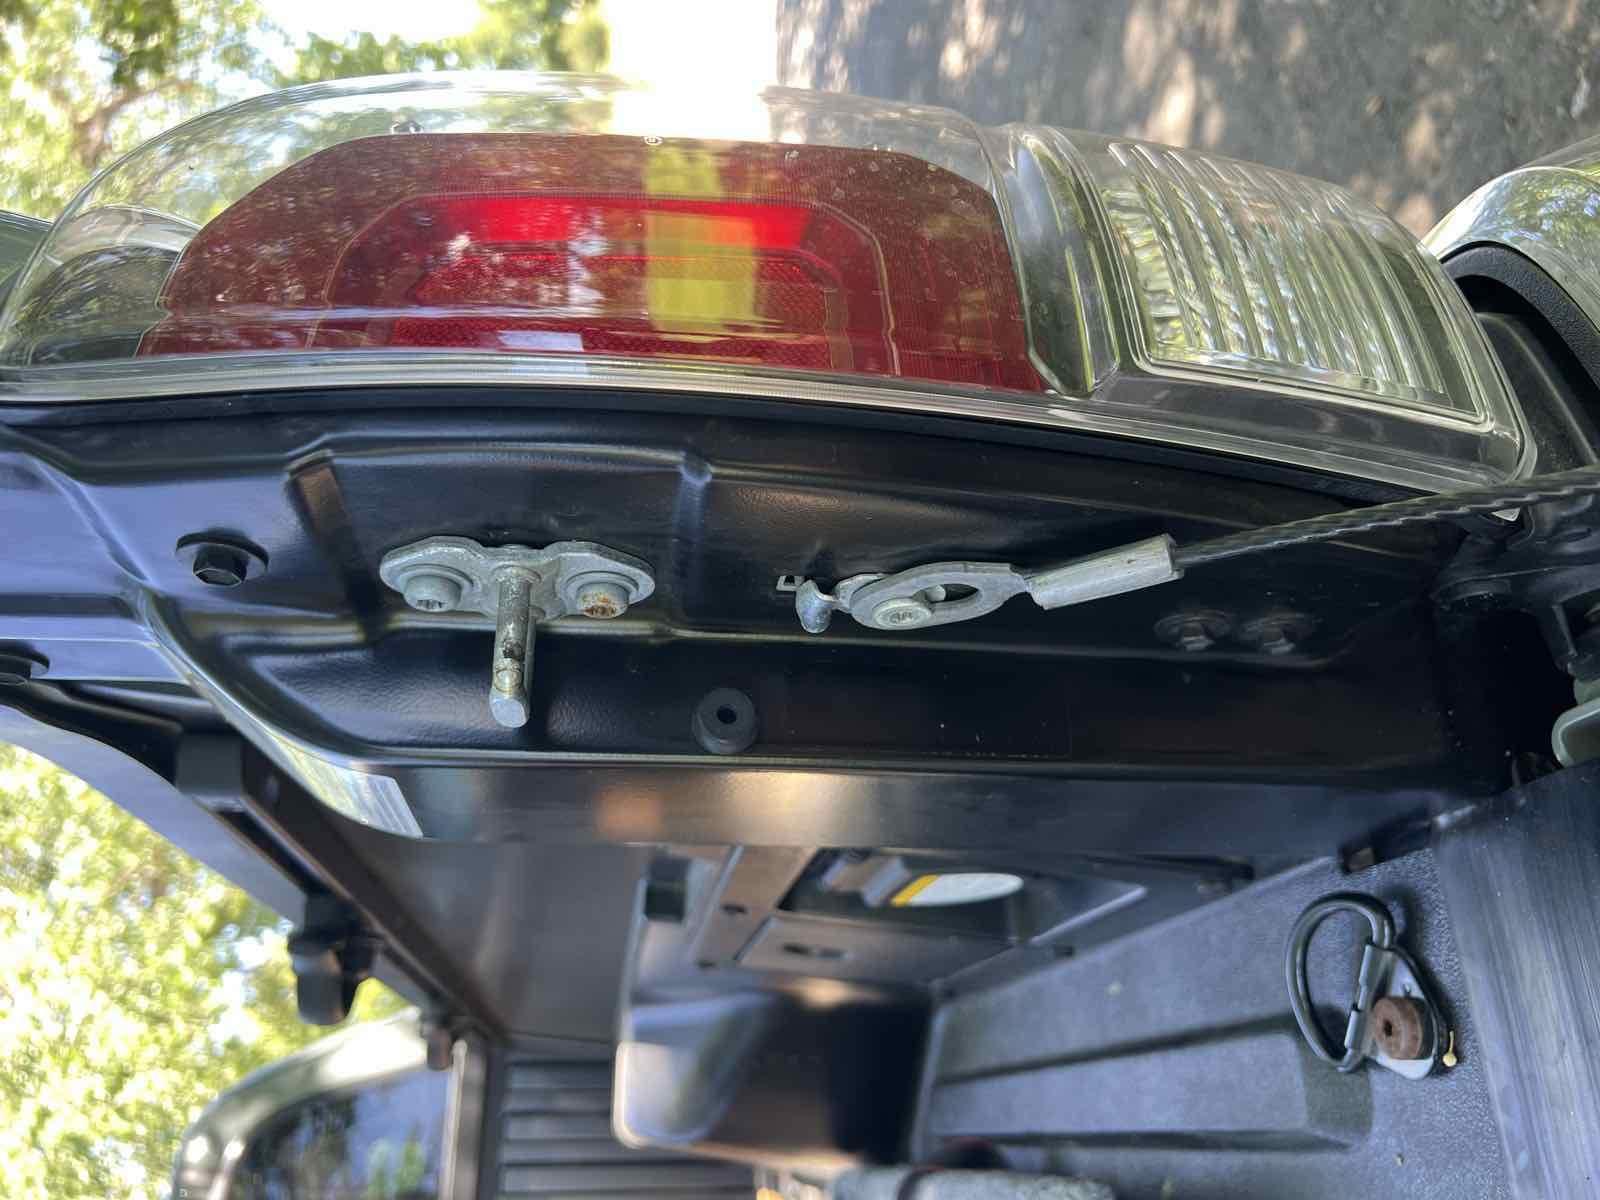
Each side takes two pieces, an upper and a lower, which is the detail that made me realise one kit really does cover the whole truck. Start at the bottom and work up.
Dry-fit these ones, unlike the ROK Block. I held each piece in place, marked it, cut to the dry fit, and only then peeled anything. The upper section needs a bit of a twist to sit right where it meets the rail, which sounds worse than it is. And plan to get it right first time: I never had to lift and re-stick a piece, and you really don’t want to. This adhesive is not designed to be repositioned.
The order I got backwards
ESI’s instructions are unambiguous, and the same line appears on every model fitment page they publish: “If installing a Tailgate Seal with Taper Seal on the sidewalls, install before ROK BLOCK seal.” Sidewalls first, gap cover second.
I did it backwards, then read the sequence properly. Beyond the corner detail below, the cost was scheduling: doing the gap cover first put its 24-hour cure in the middle of the job rather than at the end, so I had to stop and wait before I could touch the sides.
The honest outcome: it cost me very little. On a contoured Tacoma bed floor the ROK Block ends about two inches short of the sidewalls, and the two pieces sit on different planes anyway, so the side seals butt against the ROK Block at the corners instead of tucking under it. I expected to be trimming ends and dabbing sealant into each corner to bridge the joint. I used no Sikaflex at all, and didn’t need any.
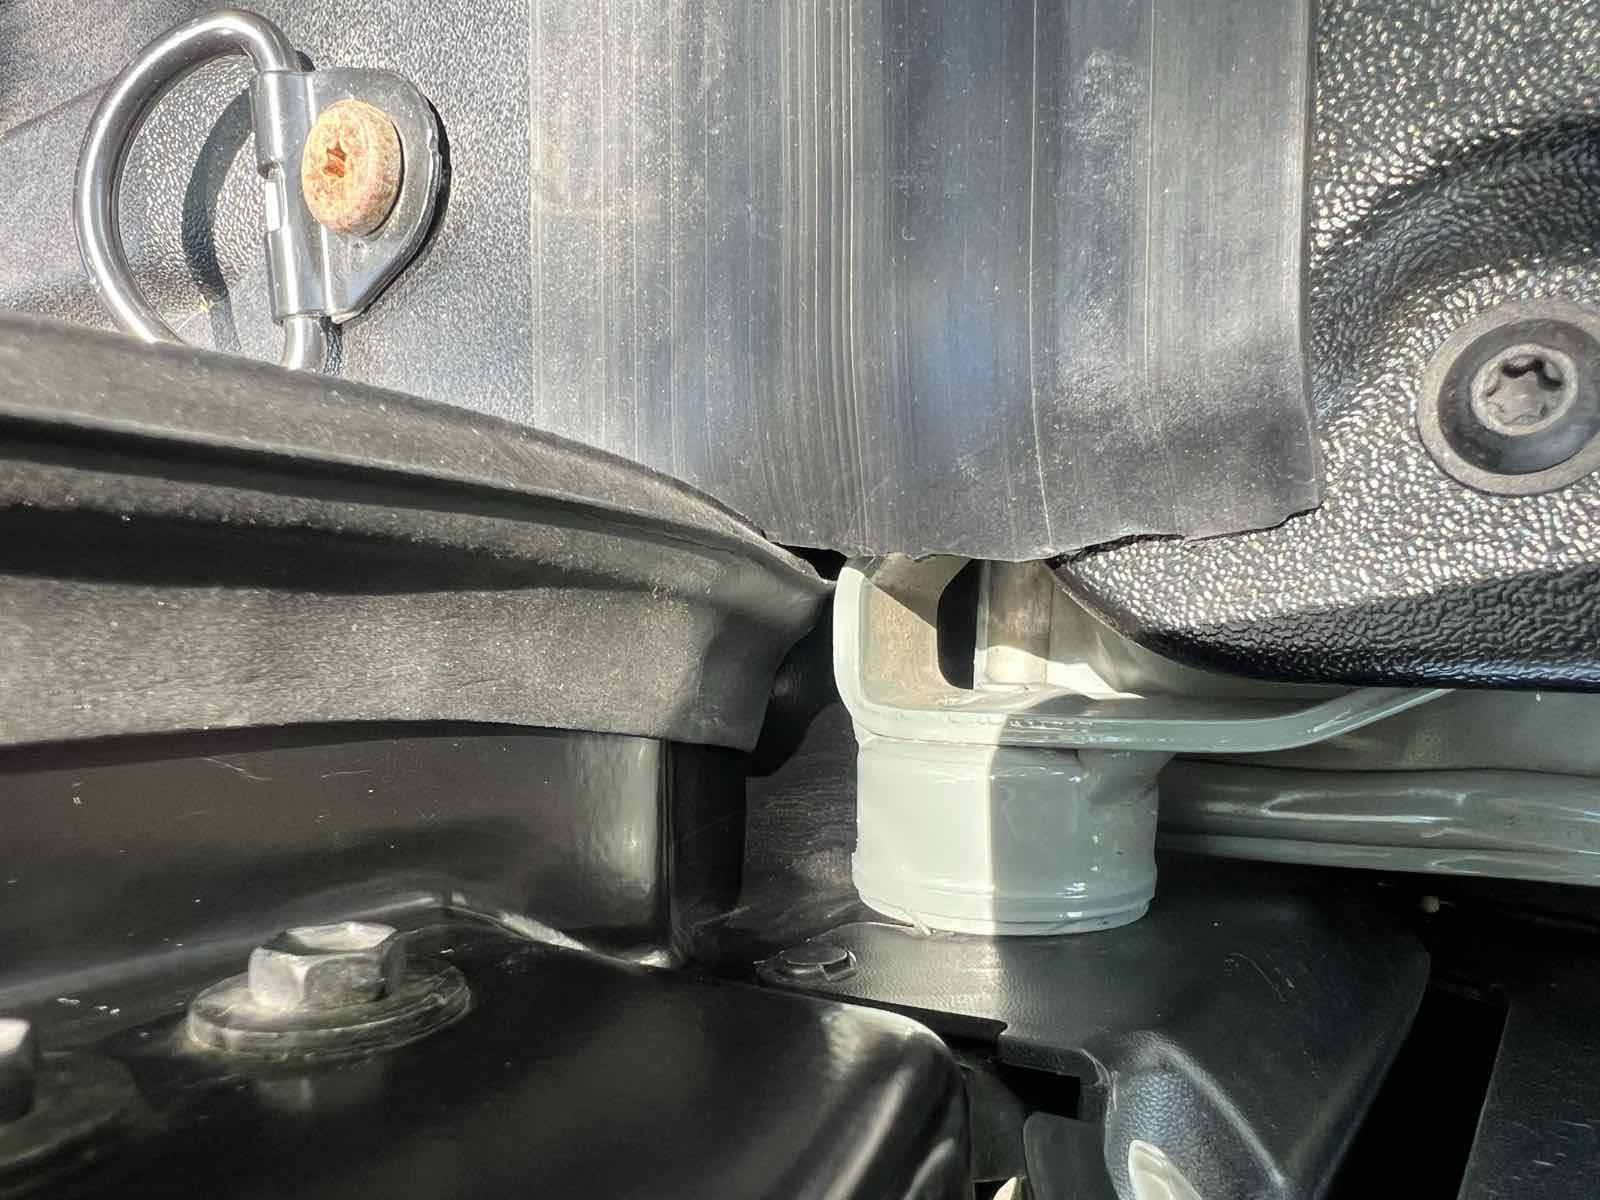
Follow ESI’s order and you get a marginally tidier corner. Do it mine and you get a slightly different corner that seals. It’s a neatness issue, not a physical dependency, and I’d rather say that than manufacture drama about a mistake that cost nothing.
Does it actually work? Six weeks on
Updated August 18, 2026, after the camper install and real miles. The honest split: excellent on dust, good but not perfect on sustained rain.
Dust. I’ve run long stretches of forest service road and I’m getting a tiny bit of dust in the bed, and no more than that. What makes that number mean something is what I’m not doing: I haven’t been running the MaxxAir fan, which owners commonly use to pressurise the camper and push dust back out. That result is the seals working on their own. I’m fully impressed with it.
Water is where it stops being perfect. I drove two hours through heavy rain. The sidewalls seem to have held, but the bottom of the ROK Block got wet and a little water made it past, leaving a damp patch in the bed liner just above the seal. I can’t tell you whether it came around the ends or soaked through. It was minor, it dried quickly, and this is Colorado rather than a Pacific Northwest winter, so treat it as one honest data point rather than a verdict. If you’re storing something that must not get damp, don’t put it right against the tailgate.
Adhesion. No lifting, no peeling, nothing letting go at the corners, through Denver summer heat and the miles since.
One interaction worth knowing if you run a molded bed liner: between its tailgate section and the ROK Block there’s extra material with nowhere to go, so the tailgate is occasionally stiff to shut and I re-close it. It’s been settling down over time. More in the bed liner writeup.
On the light test: I ran it before the camper went on and it came out very close to fully dark. I haven’t repeated it since the M1 was mounted, because once the camper is on, it’s on. I checked every angle I could reach and sealed what I could get to. If I ever pull the camper off, I’ll re-run it properly then.
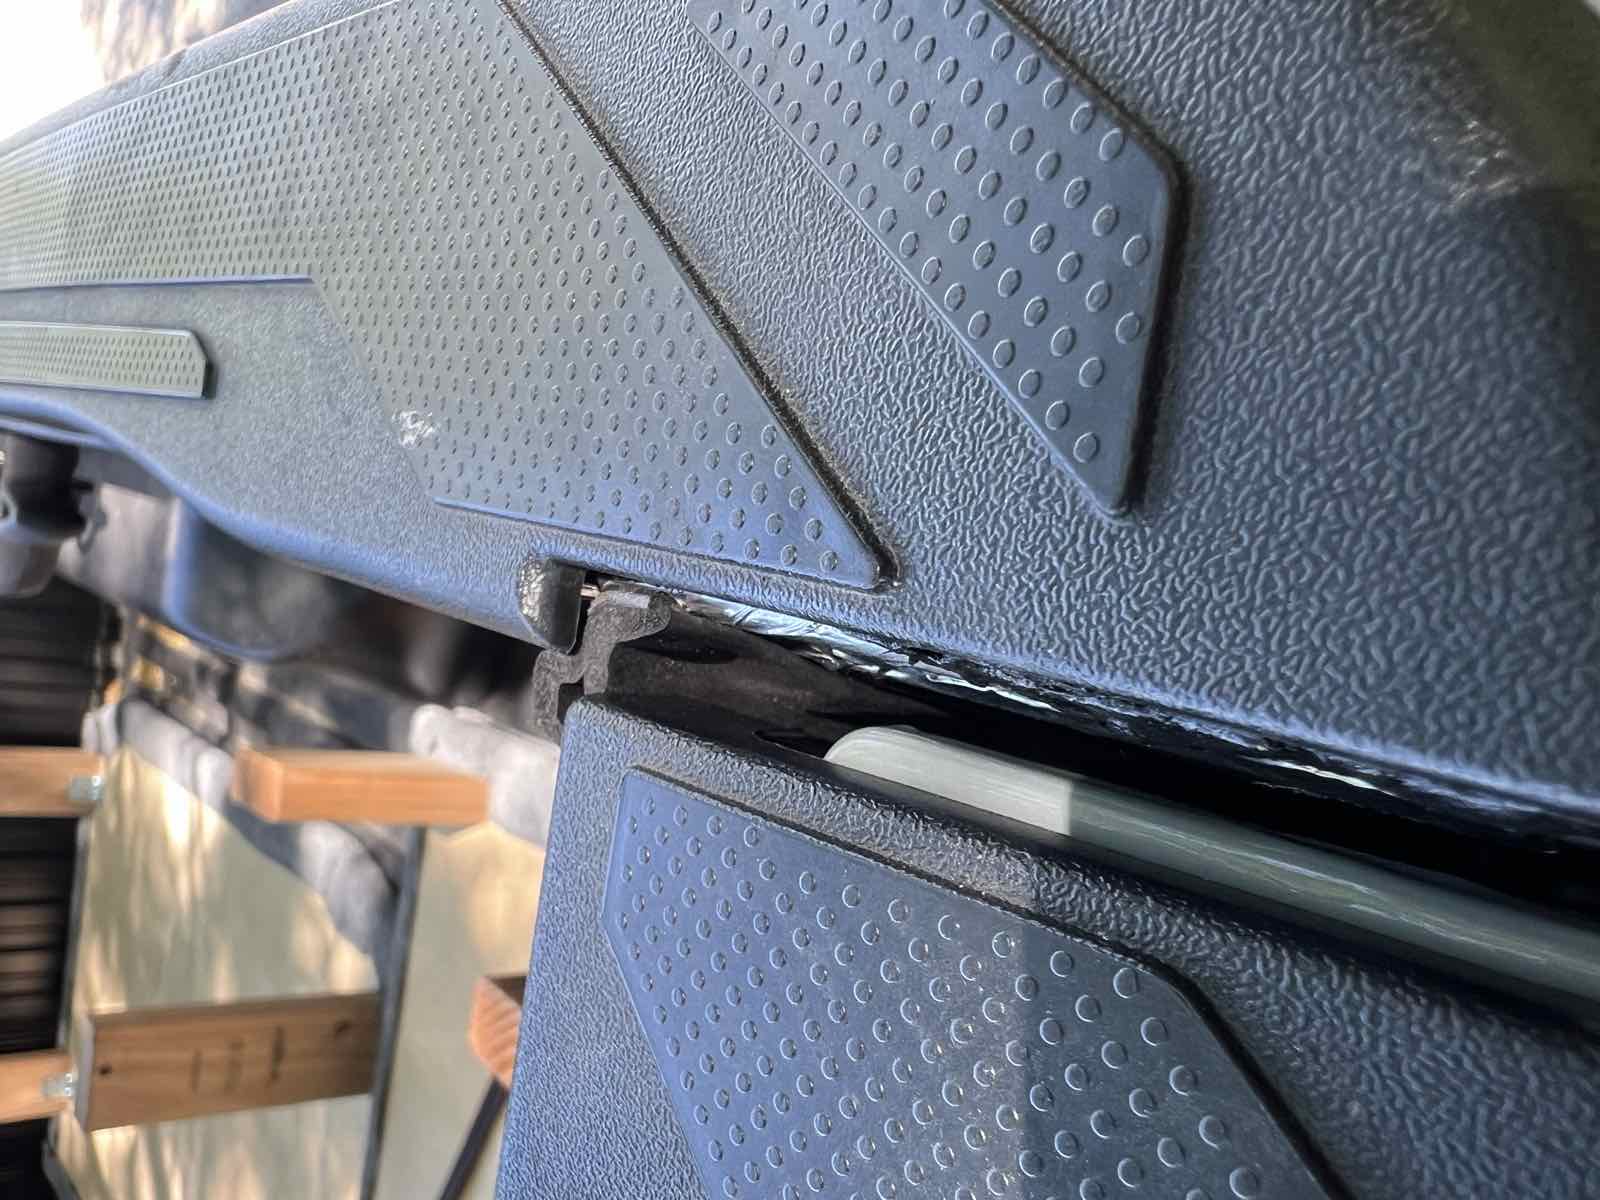
I’ll update this if anything peels over a full season. Early adhesion on a hot install is the easy part. Winter is the real exam.
What I’d do differently
- Buy the combo kit. One order, both pieces, no spare taper kit gathering dust.
- Read the sequence first. Not because reversing it hurt anything, but because five seconds of reading beats twenty minutes of working out whether you’ve ruined it.
- Solve the parking before buying. Two days of open tailgate shaped my whole week, and I learned that after the box was open.
- Position the sidewall seals slightly further back, toward the tailgate. Mine seal fine, but if I did it again I’d shift them back a touch.
- Photograph the before-and-after on the sidewall prep. The sticker-and-scrub step is the one I’d most want to check later.
Want my spare taper kit? I over-ordered, so there’s a complete unopened ESI Ultimate Tailgate Seal with Taper kit sitting on my shelf. First person to email [email protected] and cover shipping gets it. One kit, one time, and I’ll strike this box out when it’s gone.
My take
Cheap, reversible, no drilling, and a real payoff if the bed is your storage. The lesson worth carrying is the one in the middle of this page: the gap cover alone leaves your corners open, and the sidewall seals are what actually finish the job. Buy them together, block out a day where the truck can sit open, do the sides first, then run the light test, because that’s the only thing that tells you it worked. If you’re working through the rest of the bed, sealing the rails is the job that can’t wait, and the payload calculator is where to check what all this gear costs you in weight.